How to Use CloudFront as CDN to serve a Static Website hosted on AWS using AWS CLI?

For storing the static content(images/videos) of our website, we normally use the AWS S3 service which gives us an endpoint(URL) that we linked to our website to showing content. But this is not a good way because it increases the latency of our website. Here the role of Content Delivery Network(CDN) comes into play.
A content delivery network (CDN) refers to a geographically distributed group of servers that work together to provide fast delivery of Internet content.
A CDN allows for the quick transfer of assets needed for loading Internet content including HTML pages, javascript files, stylesheets, images, and videos. The popularity of CDN services continues to grow, and today the majority of web traffic is served through CDNs, including traffic from major sites like Facebook, Netflix, and Amazon.
In AWS, We also have one service which we use for Content Delivery Network named AWS CloudFront.
Amazon CloudFront is a fast content delivery network (CDN) service that securely delivers data, videos, applications, and APIs to customers globally with low latency, high transfer speeds, all within a developer-friendly environment.
CloudFront works seamlessly with any AWS origin, such as Amazon S3, Amazon EC2, Elastic Load Balancing, or with any custom HTTP origin. By using CloudFront service, no one can access my S3 bucket endpoint directly.
Some major benefits of using CDN are Improving website load times, Reducing bandwidth costs, Increasing content availability and redundancy, and Improving website security.
Steps to create this High Availability Architecture:
- Configuring WebServer on EC2 Instance.
- Document Root(/var/www/html) made
persistent by mounting on EBS Block Device. - Static objects used in code such as
pictures stored in S3. - Setting up Content Delivery Network using
CloudFront and using the origin domain as S3 bucket. - Finally, put the Cloud Front URL on the
WebApp code for security and low latency.
One more thing is that I’m going to use AWS CLI tool with manual steps too to create this High Availability Architecture…
One Important thing is, I’m using N. Virginia region to show this demo, if you are working on any other region, then CloudFront takes some time to update all the servers.
Step 1- Configure WebServer On EC2 Instance:
To create your EC2 instance, go to Amazon EC2 in the AWS console. Click the button that says Launch instance to open the instance creation wizard.
- Select the AMI which you want. I’m choosing Amazon Linux 2 AMI here.

- Choose an Instance type.

- In Configure Instance Details, give configuration script in User data to configure the system:

- In Security Group, Allow two ports for SSH and HTTP.

- It is now time to launch your EC2 instance. Click the Launch button to create your EC2 instance. Attach one key with EC2 instance so that I can login through SSH later.


For creating instance using AWS CLI, run commands…
Creating a key:
aws ec2 create-key-pair --key-name {key_name}For creating a security group:
aws ec2 create-security-group --group-name {group_name} --description "My security group" To Allow specific port in security group:
aws ec2 authorize-security-group-ingress --protocol tcp --port 80 --group-name {group_name} --cidr 0.0.0.0/0For launching an instance:
aws ec2 run-instances --image-id {ami-id} --key-name {key_name} --user-data file://{file_name}.txt
Step 2- Create one EBS Volume and mount it to Document Root (/var/www/html) for code persistent:
It is always good to store the data in another harddisk rather than root harddisk. That’s why we use EBS volume to store our website content so that if our instance is terminated, our code doesn’t lose.
- To create EBS Volume, Go to Elastic Block Store in EC2 console and click on Create Volume. Give some size and choose Availability zone.

- After that, Click on Create Volume and finally, EBS is created.
- Now we attach it to the same instance, which we use above.


- Do SSH and mount this volume to DocumentRoot of HTTPD software.
AWS CLI Commands:
To Create a EBS Volume:
aws ec2 create-volume --availability-zone {same_as_instance} --size 1To Attach EBS with AWS Instance:
aws ec2 attach-volume --device --instance-id --volume-id
To mount a volume, we have to follow these three steps:
- Create a partition using command, fdisk /dev/sdf(Volume_name)

2. Format the partition using command, mkfs.ext4 /dev/sdf1(partition_name)
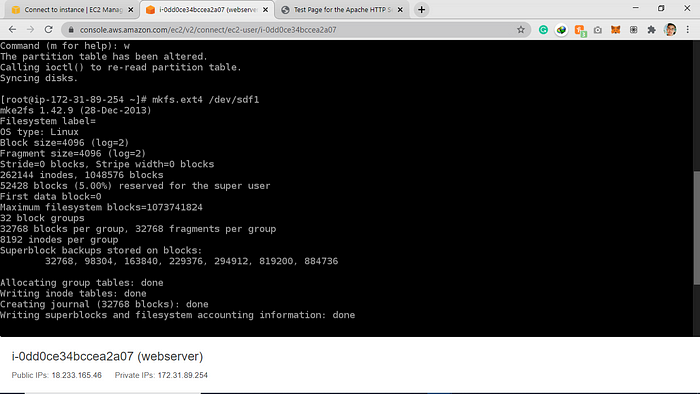
3. Mount the partition using command, mount /dev/sdf1 /var/www/html

Step 3- Static objects used in code such as pictures stored in S3:
- Create S3 bucket first, Go to AWS S3 page and click on Create Bucket…


Go to Block Public Access settings for this bucket and there untick Block all public acces.

Upload the content which we are going to use in our site…

Click on Upload and then choose Add files, or Add folders.


AWS CLI Commands:
To create a S3 Bucket:
aws s3 mb  s3://{Bucket_name}To copy the content from local to S3 Bucket:
aws s3 cp {file_name} s3://{Bucket_name}/{file_name}
Step 4- Setting up Content Delivery Network using CloudFront and using the origin domain as S3 bucket:
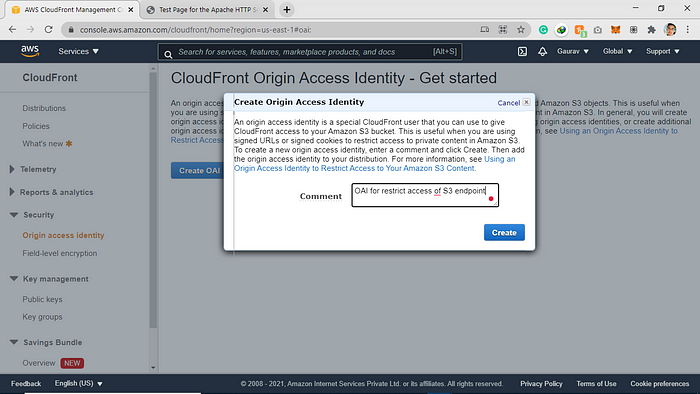
- For creating CloudFront Distribution, go to AWS CloudFront page. Create Origin Access Identity(OAI) to restrict the access of S3 endpoint.

Click on Create OAI and give some comment and click on Create.

In addition to the distribution settings that we need for our use case, enter the following:
- For Origin Domain Name, select the bucket that you created.
- For Restrict Bucket Access, select Yes.
- For Origin Access Identity, select same which we created.
- For Grant Read Permissions on Bucket, select Yes, Update Bucket Policy.

And do any other changes if you want, else Click on Create Distribution.

Go to your bucket and check your Bucket Policy in Permissions Section.

We can see the image by using CloudFront URL/path_to_content now.

AWS CLI Commands:
Creating an OAI(Origin Access Identity):
aws cloudfront create-cloud-front-origin-access-identity --cloud-front-origin-access-identity-config file://{config_file}.jsonCreating a CloudFront Distribution:
aws cloudfront create-distribution --distribution-config file://{cf-config}.jsonCreating S3 Bucket Policy:
aws s3api put-bucket-policy --bucket cf-s3-cli-bucket  --policy file://{policy}.json
For content of above mentioned file, click here…
Do changes according to own content.
Step 5- Put the Cloud Front URL on the WebApp code for security and low latency:
For this, we have many ways; you give CloudFront URL to developer and they update and push the code again. Or you directly do some changes.
For showing this demo, I use the following HTML to create one index file:
<head>
    <title>My Website Home Page</title>
</head>
<body>
  <h1>Welcome to my website</h1>
  <img src="cloudfront_url/path">
</body>
Thanks for coming till here…
I have one more interseting blog for you related to same architechture, but this time I try to do the things automated using terraform…
Github Link for your Reference:
Feel free to connect on linkedin…😊
Having any issue related to task, please DM me…